Steam Deck Installation
Before starting, make sure Hades II is installed to the Steam Deck's internal storage, NOT the MicroSD card! If using Zagreus' Journey, Hades also needs to be installed on the internal storage.
Part 1 - Getting r2modman to work in Gaming Mode
1. Enter Desktop Mode
- Press the
STEAMbutton. - Go to
Power. - Select
Switch to Desktop.
2. Download and install AppImageLauncher
Steam will not run .AppImage files by default and we need a workaround for this.
- Download the AppImageLauncher installer from the AppImageLauncher Github releases page.
- Move the AppImageLauncher
.AppImagefile to your Home directory.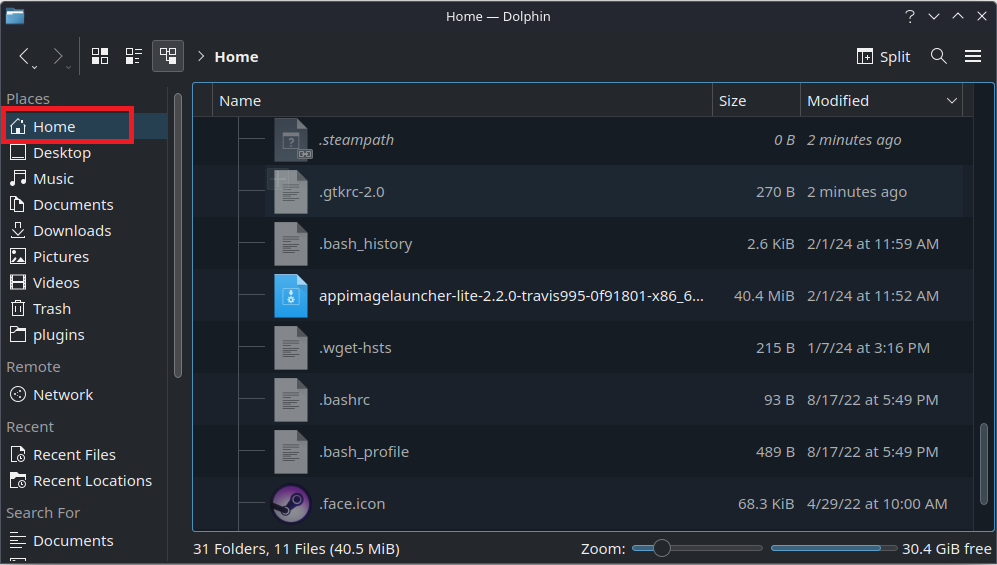
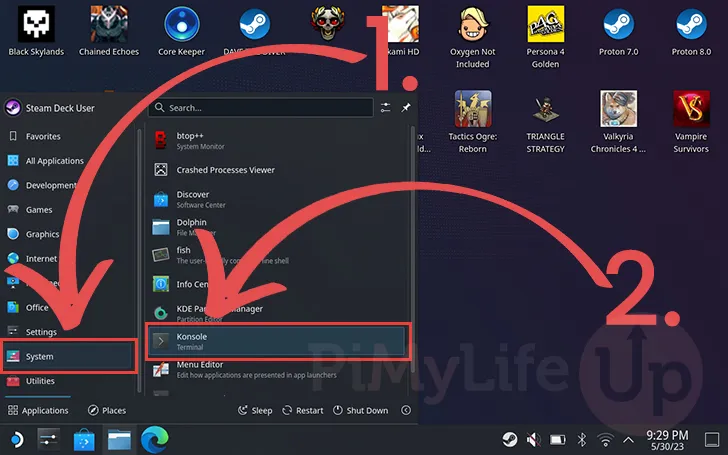
- Open up Konsole (from the bottom left Start button > System > Konsole)
- Copy the following text:
chmod +x appimagelauncher-lite-2.2.0-travis995-0f91801-x86_64.AppImage
./appimagelauncher-lite-2.2.0-travis995-0f91801-x86_64.AppImage install
- Paste it into Konsole using the
Pastebutton in the top-right of the application.
- Press
Enteron your keyboard (STEAM+X).
3. Download and install r2modman
- Download the r2modman installer from the Thunderstore r2modman page
- Important - use the "Manual Download" button!
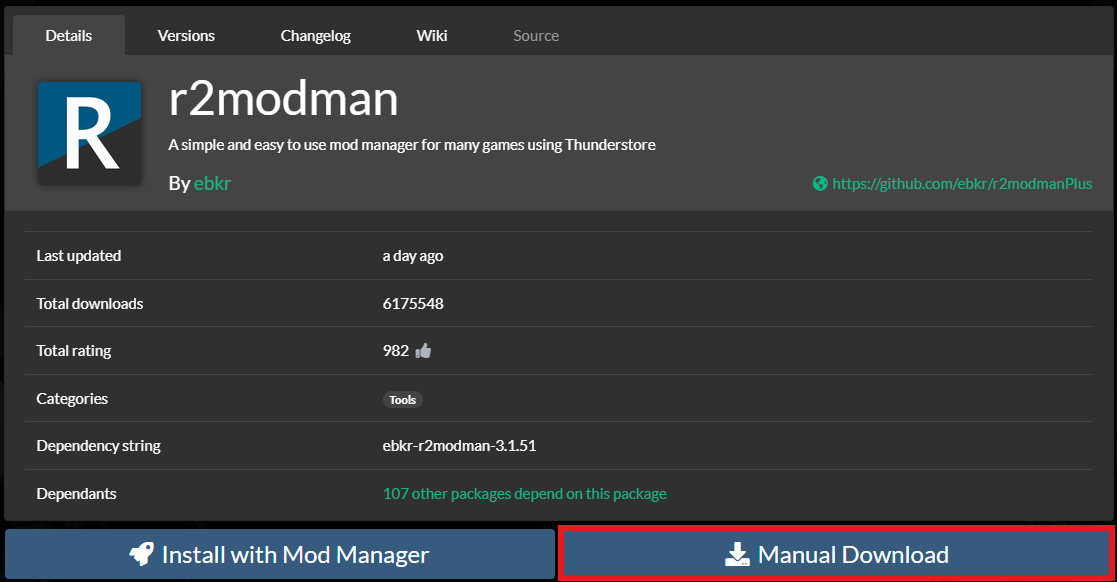
- Important - use the "Manual Download" button!
- Open the downloaded file and move the r2modman
.AppImagefile into your Home/Applications directory.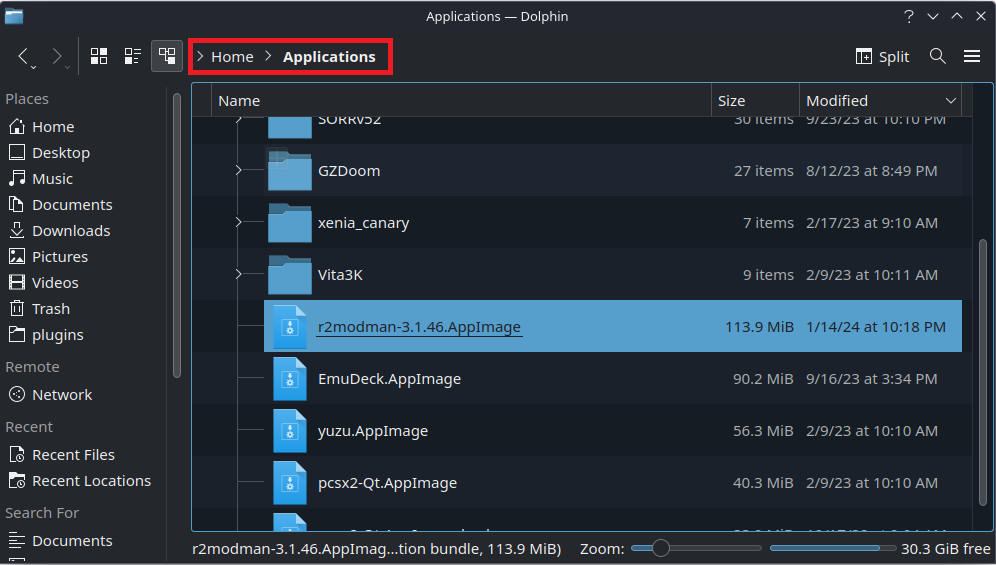
4. Add r2modman as a Non-Steam Game
- Open Steam in Desktop Mode. There should be a shortcut on your desktop.
- Click the Games menu.
- Click Add a Non-Steam Game to My Library.

- Locate r2modman (version number) in the list by scrolling, NOT Browse.
- Select it and click Add Selected Programs.
5. Start r2modman and set Steam/Hades II directory
- Open Steam. Mode shouldn't matter here.
- Select r2modman.
- Select Hades II as the game, and open the Settings.
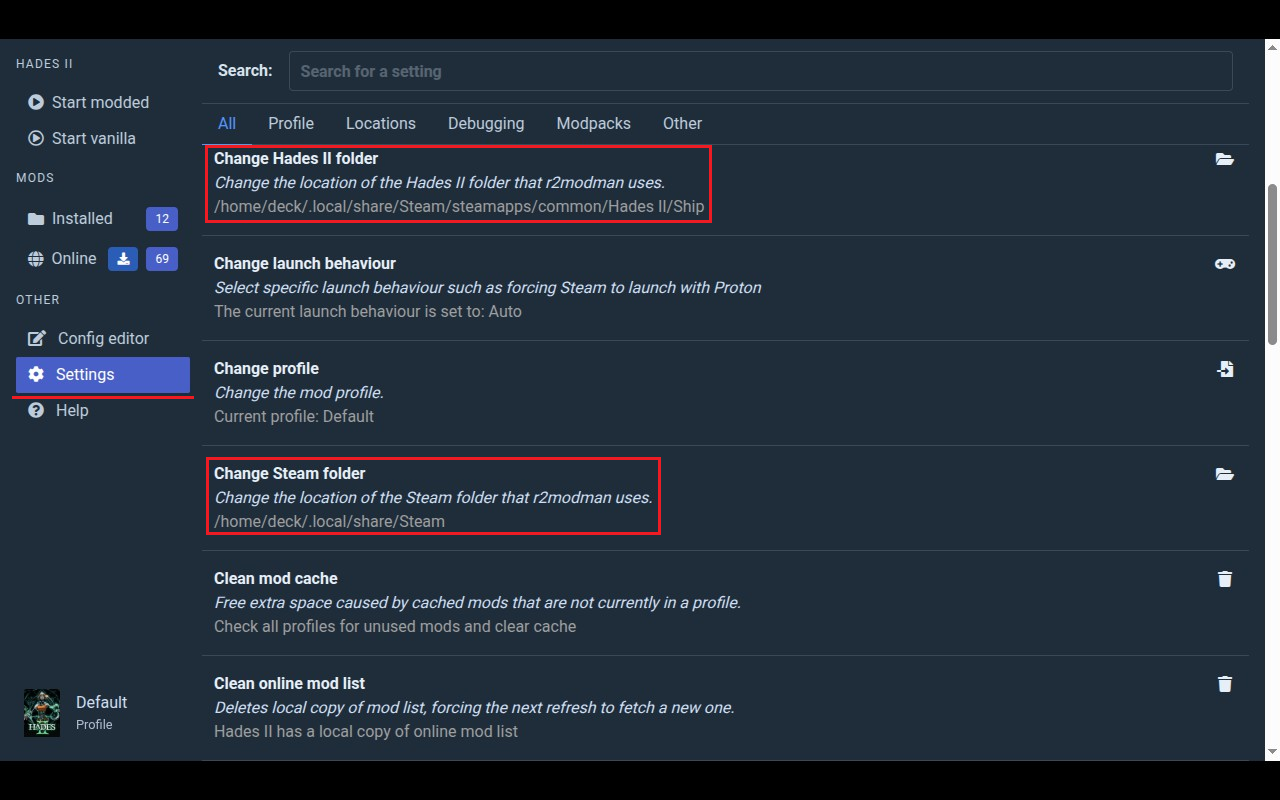
When browsing for your Steam directory, the .local directory may be hidden by default. In this case, set your file browser to show hidden files.
- Select Change Steam folder, and navigate to
/home/deck/.local/share/Steam. - Select Change Hades II folder, and navigate to
/home/deck/.local/share/Steam/steamapps/common/Hades II/Ship.
Congratulations! You can now open r2modman in Gaming Mode, in the Non-Steam category of your library.
You will want to either use the Touchscreen for mouse control within r2modman, or change the Controller scheme in Steam for the r2modman "game" to be set to the Keyboard (WASD) and Mouse template.
Part 2 - Booting Hades II directly with mods in Gaming Mode
The steps in Part 1 only allow you to run modded if you start r2modman, then select Start Modded. These steps will further automate the process, forcing the Hades II shortcut to properly load your mods.
1. Enter Desktop Mode
- Press the
STEAMbutton. - Go to
Power. - Select
Switch to Desktop.
2. Open r2modman
- Search for Hades II.
- Click Select Game.
- Click Select Profile to continue with the Default profile (or make a new profile if you like).
- Browse the Online mod section.
- Install at least ONE mod.
- Click Settings.
- Scroll down to Change Hades II folder and click.
- Navigate into the Ship directory.
- Select Hades2.exe.
- Click Select Executable.
- Keeping r2modman open, go to Step 3.
3. Open Steam
- Go to the Properties for Hades II.
- In General > Launch Options, input the following text:
WINEDLLOVERRIDES=d3d12=n,b %command%
- In r2modman, click Help and scroll to the bottom.
- Click the Copy launch arguments button.
- Go back to your Steam Launch Options, press
spaceafter the%command%portion, and paste the copied launch arguments. - It should now look something like this, assuming your profile is named Default:
WINEDLLOVERRIDES=d3d12=n,b %command% --rom_modding_root_folder "/home/deck/.config/r2modmanPlus-local/HadesII/profiles/Default"
4. Launch the game in Desktop Mode
You will likely need a way to plug in/bluetooth a physical keyboard, as the Steam Deck’s on-screen keyboard can be weird for this next part.
- In r2modman, click Start Modded.
- Load a save, preferably where you are in the Crossroads.
- Important - the Steam Deck keyboard does NOT have an
insertkey, so this next part may be easier with a keyboard connected. - The ImGui interface will pop up and require you to press
insertto dismiss it.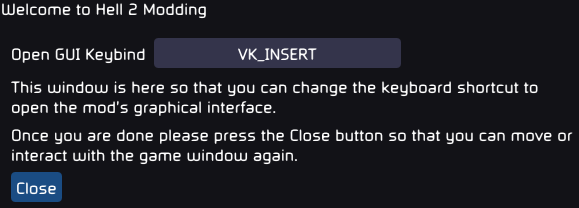
- If you have a physical keyboard connected, you can press
insertto close the GUI and simply continue playing. - If you do NOT have a physical keyboard connected, first use the touchscreen to press where it says
VK_INSERT. This will allow you to set a new bind. - Bring up the keyboard with
STEAM+X. - Press a new key - I suggest
Tab. - Close the keyboard.
- Press the Close button in-game.
- Exit the game.
- If you have a physical keyboard connected, you can press
Certain mods can only configured in-game with the ImGui menu.
5. Go back to Gaming Mode
You should now be able to start Hades II directly, with your mods loaded. Enjoy!
Troubleshooting
r2modman doesn't start in Gaming Mode anymore!
You've most likely downloaded an update to r2modman, and your shortcut is now pointing to something that doesn't exist. Delete your old r2modman shortcut, then go back to Desktop Mode and repeat Step 4.
Hell2Modding/ImGui is stuck with Insert as a bind!
- The default ImGui keybind is
insert, which the Steam Deck keyboard doesn't have. There are a few ways past this:
Option 1. Pair a keyboard in Desktop mode and set a different bind.
Option 2. Manually edit the bind:
- In r2modman, go to the Config editor under the OTHER section.
- Locate
Hell2Modding-Hell2Modding-Hotkeys.cfg. - Click Open File (NOT Edit config).
- Change the line to:
gui_toggle = 'VK_TAB' - Save.
- This will set the key to
Tab.
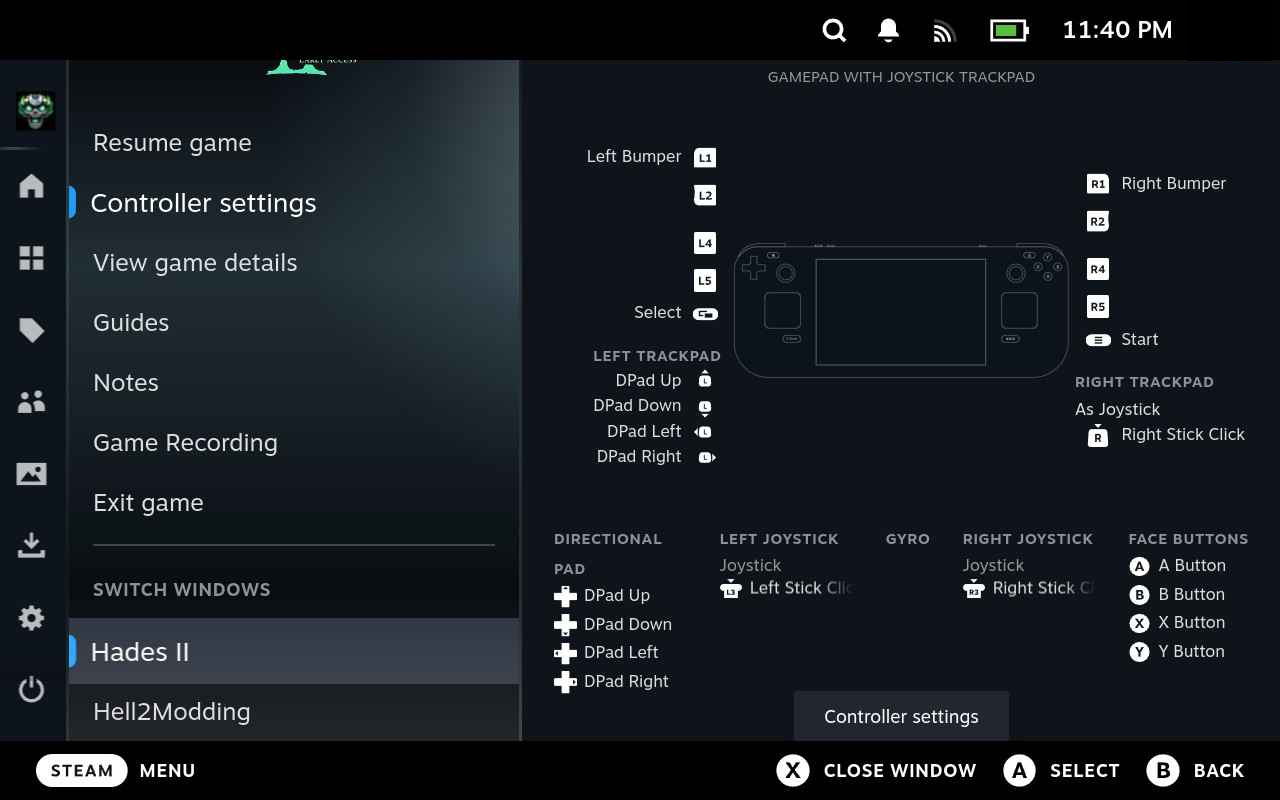
I'm stuck on the Hell2Modding console!
- Press the
STEAMbutton. - In the Hades II game menu, switch the window back to Hades II.
Acknowledgements
- Thank you to Kenorah for writing the bulk of the guide, and providing great screenshots!
- The Lethal Company wiki (https://lethal.wiki/installation/installing-r2modman-linux) for laying the groundwork of how I understood to get r2modman running through Game Mode
- Hades Modding Discord
- Jowday - for being my first point of contact regarding Steam Deck installation and bouncing ideas off
- Ellomenop - for always being there when I fall short of Hades modding inquiries